
This was my first attempt at string art, and I have to say I’m pleased as punch with the result! You could change up the word on this and use it as a gift for so many occasions! Once you’ve nailed the basic technique (see what I did there?) you could create other words or shapes.
I made this one for my mom for Mother’s Day. (I know, Mother’s Day was a couple months ago…my tutorial is a little behind.) My daughter and nephews call her Mimi, so I decided to use that for this sign, and I added clothespins so she can rotate current pictures of the kids.
You’ll need:
- Plain wooden sign (I got mine at Michael’s, but here’s a similar one. This one would be great if you are not leaving space for photos.)
- Yarn or String
- Small nails (I used these ones simply because the rose gold-ish color caught my eye!)

The first step is to decide what word or name you want to use and print it out using a chunky font. The sizing may take a little trial and error and tweaking to make it fill the appropriate space. Tape your word on using small pieces of tape. (I like washi tape for situations like this because I know it will peel off easily after.)


Begin outlining your letters with the nails, making sure to space them evenly, and nail them in at approximately the same depth. I spaced them about 1/2 inch apart, and left about 1/2 inch of the nail exposed.
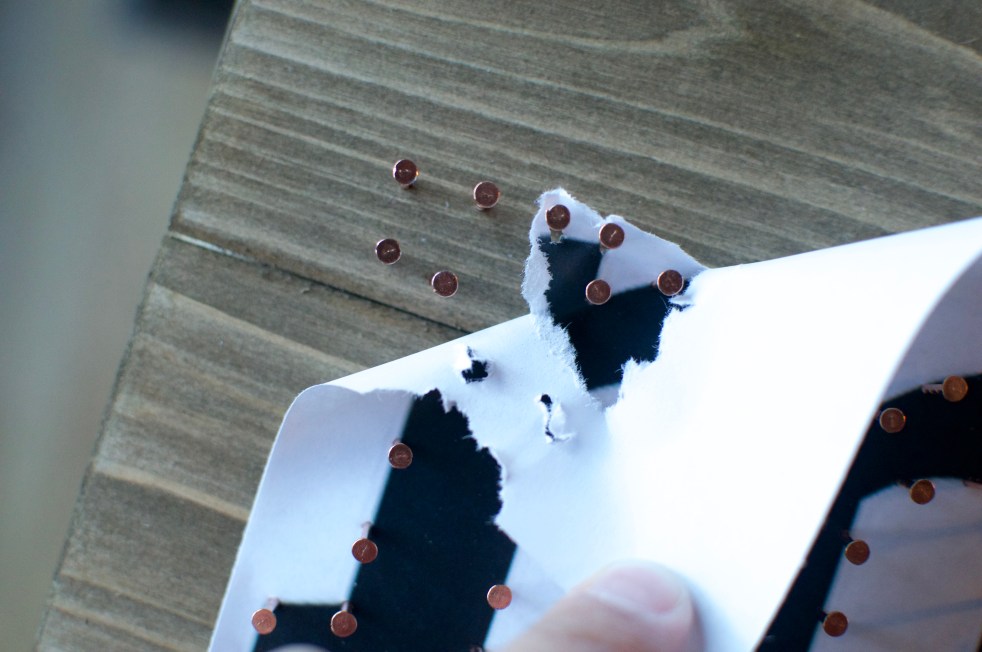
Gently pull your paper off the board. If you try and just rip it off all at once, you risk pulling nails out with it. It might take a little patience, but take your time. If there are little pieces left that are wedged in at the base of the nails, you can use a pair of tweezers to pull them loose.


Tie one end of your yarn around a nail, and begin wrapping around each nail, outlining the letter first. Once your letters are outlined, you can wrap and criss cross every which way throughout the letter. Wrapping the yarn towards the outside of the nails when you make the outline will give a smoother outer edge. (I understand that seems vague, but I promise when you start playing around with it, you will see what I mean.)
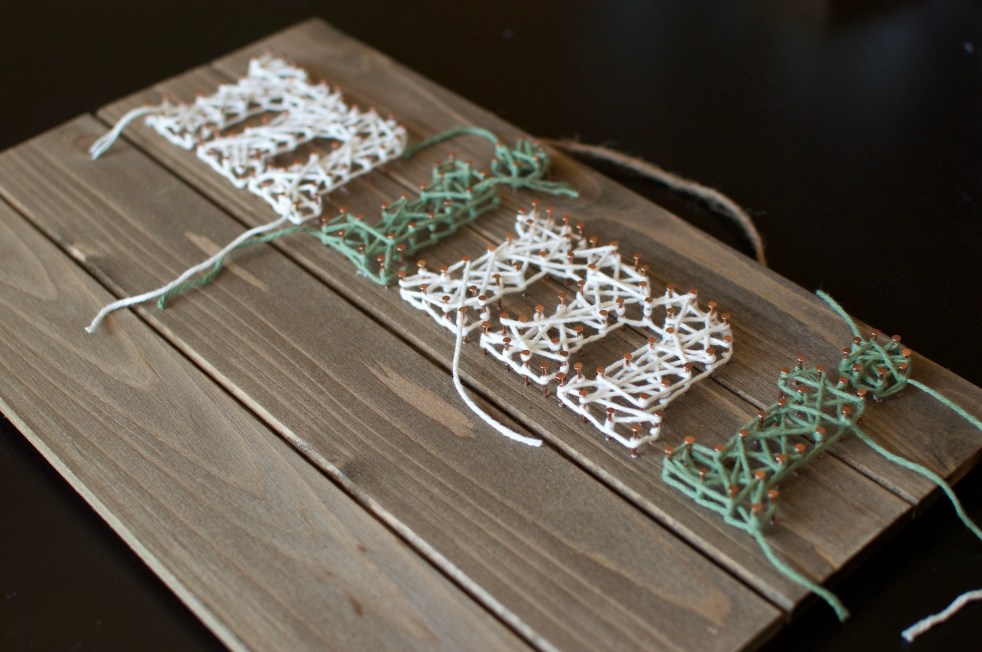
Once your letters are filled, tie a knot around another nail. You can do one of two things with your leftover tails. I just trimmed them short and tucked and wove them into the center of the letters. I have also seen people take a small paintbrush with a little Elmer’s glue and smooth the small tail onto another piece of yarn. To each his own.

Under the name, I used hot glue to attach four small clothespins. My mom will be able to fill these with pictures of the grandkids and easily switch them out for updated snapshots. This would also be a great place to hang to-do lists, grocery lists, coupons, or even notes to your family.
Have you ever made string art before? Did you do a word or a picture?


