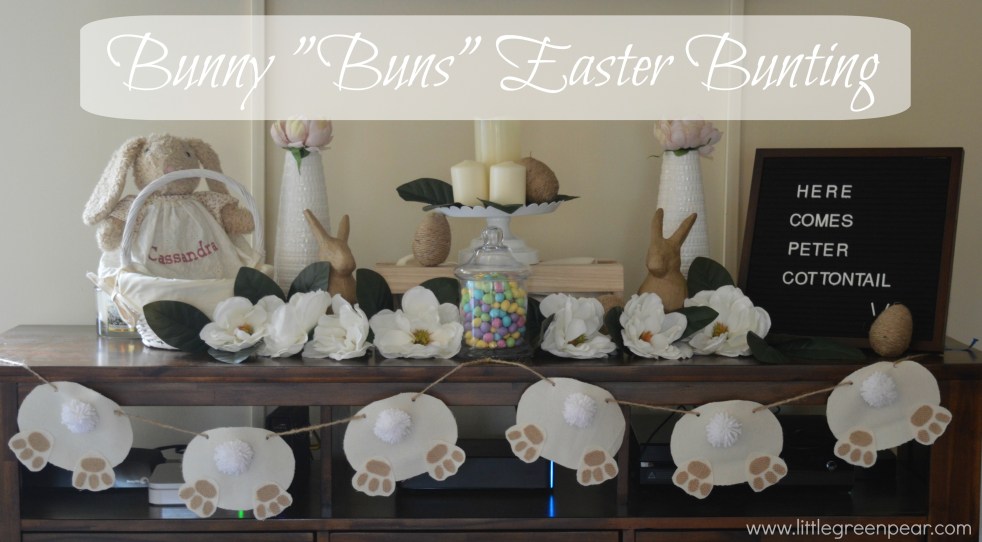
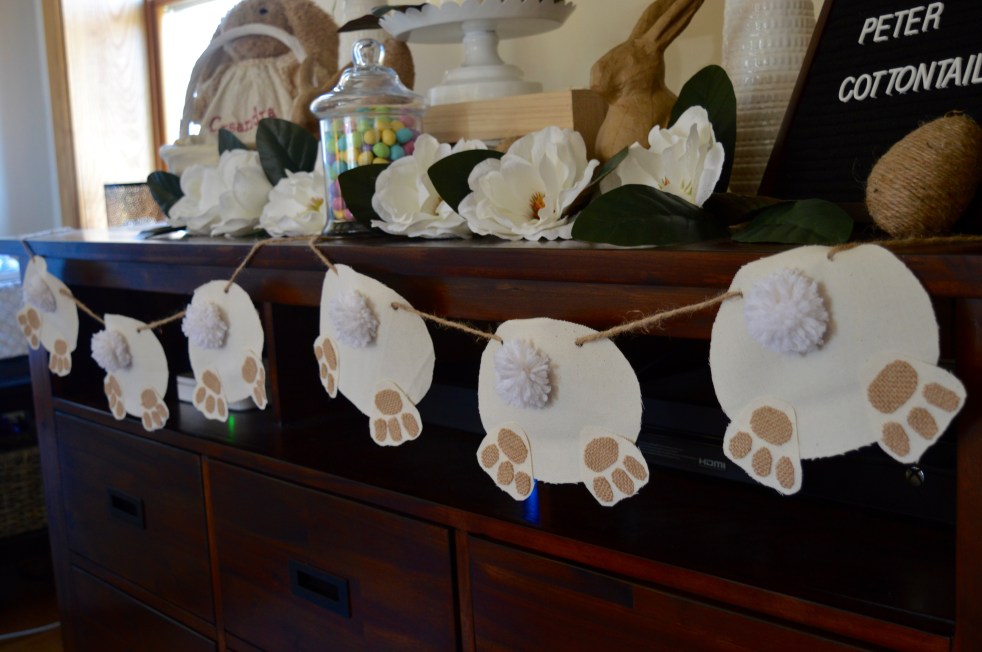
With Easter just around the corner, I wanted to share with you how I made this adorable bunting. Generally when you think of bunny decor, you think of those iconic large ears. Well I wanted to change it up a little bit and show off those cute little buns and fluffy tail instead!
We don’t actually have a mantle in our house, but since our TV is hanging on the wall, that leaves the top of our entertainment unit free for holiday decor! This bunting was perfect to hang right across the front. It would be adorable across a real mantle, a window, or even across the front of a table for party decor.
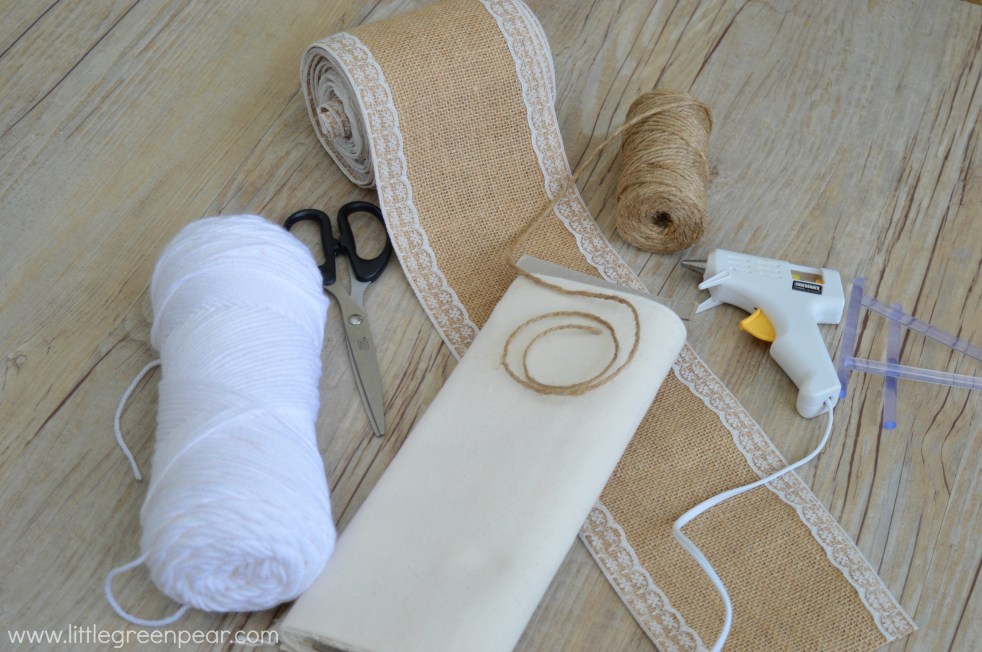
To make this banner, you will need:
- Light colored home decor weight fabric.
- Burlap
- Yarn
- Hot glue gun and glue sticks
- Scissors
- Twine
- Hole punch

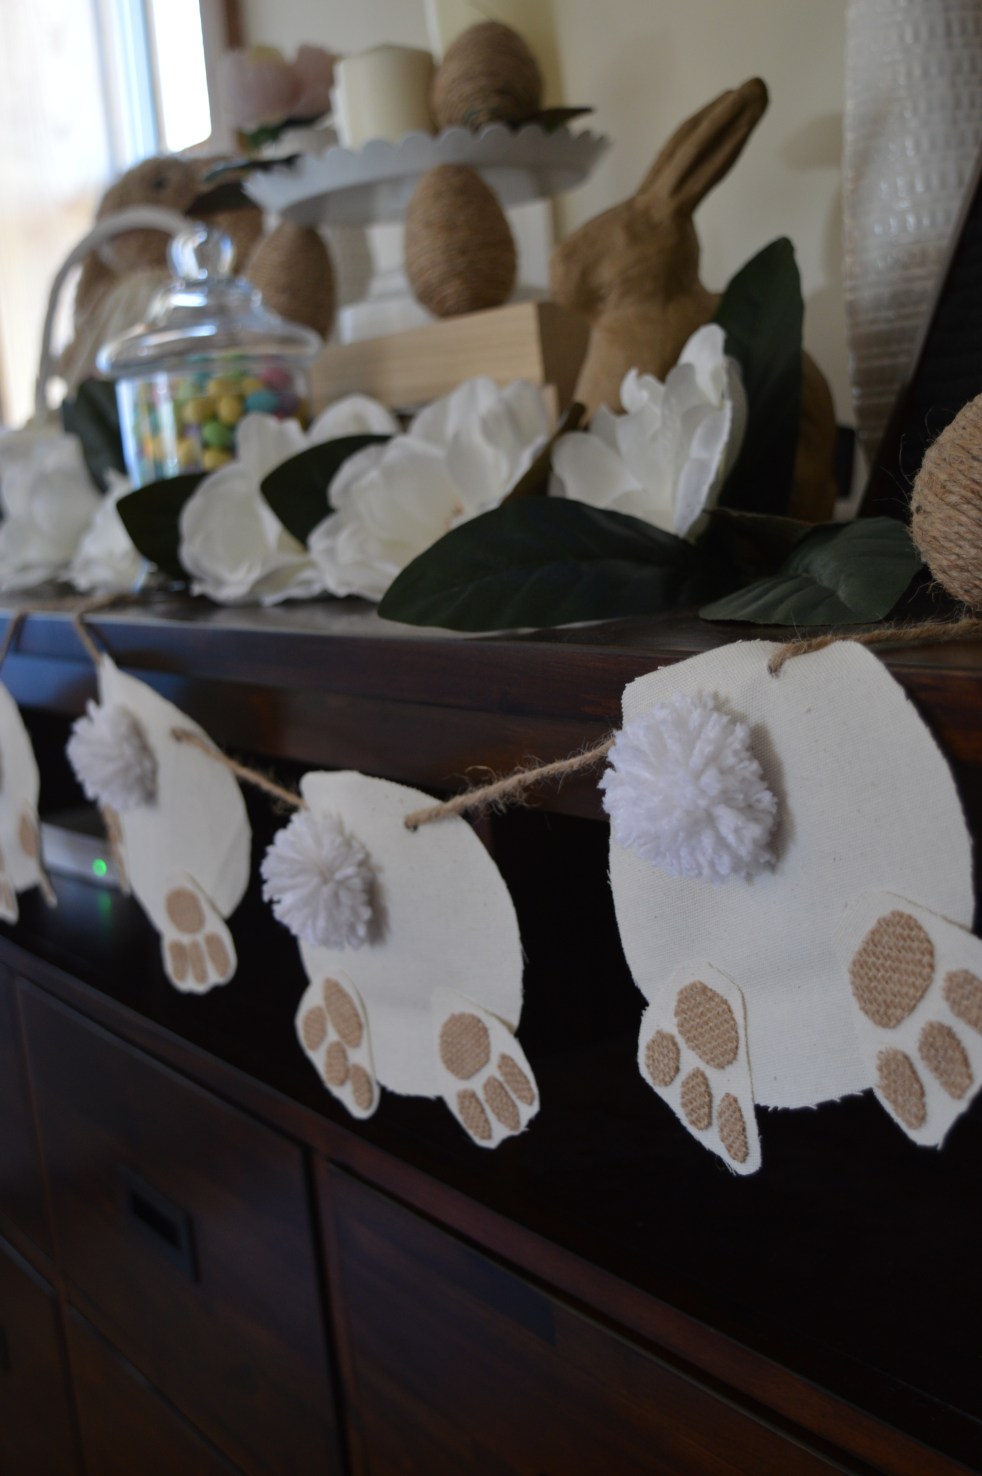
You have a couple options for the body and feet. I used this small oval bucket (about 6″ wide) for the body, and I drew the feet free hand, but if you don’t want to wing it, I provided you a printable template to take out the guess work!
Click here for your free template.
Whichever you decide to use, trace the shapes on your fabric and cut them out. I made six “buns” for my banner, but it will depend on how wide of a space you will be using it for.
Hot glue the feet onto the bottom of the body shape, and add toe and foot pad details with burlap. *Cutting burlap into tiny pieces such as these is dusty and messy, as burlap loves to fray…you have been warned…* If that pile of burlap dust doesn’t sound like your cup of tea, I bet this would also be cute if you drew on those details with puffy fabric paint!
If you’d like to go quicker and simpler, you could always buy ready-made pom poms for the little bunny tail, but I wanted to make my own.

- To begin, place an 8 or so inch piece of yarn between two of your fingers. This will be used later in the process.
- Begin wrapping yarn around those same two fingers. the amount of yarn you wrap will depend on how “full” you want your pom pom to be. This might take some trial and error. (I unfortunately didn’t count the number of wraps I made…so I can’t give you a ballpark. I just wrapped until it seemed right.)
- Grab that piece of yarn that was resting between your fingers and tie it around all of the layers.
- Pull the whole thing off your hand, and tie tightly.
- Cut through all of the loops that you created.
- At this point, you can trim up any odd lengths and shape it into a nice round pom pom!
Once you’ve hot glued the tail onto the body, you’ll need to string them onto the twine. To do this, I used an ordinary hole punch to create two holes in the top of the body. I threaded down through the front of one side and out the other.
Hang your new set of bunny “buns” and enjoy while you wait for the Easter bunny to hop on by! Happy Easter!
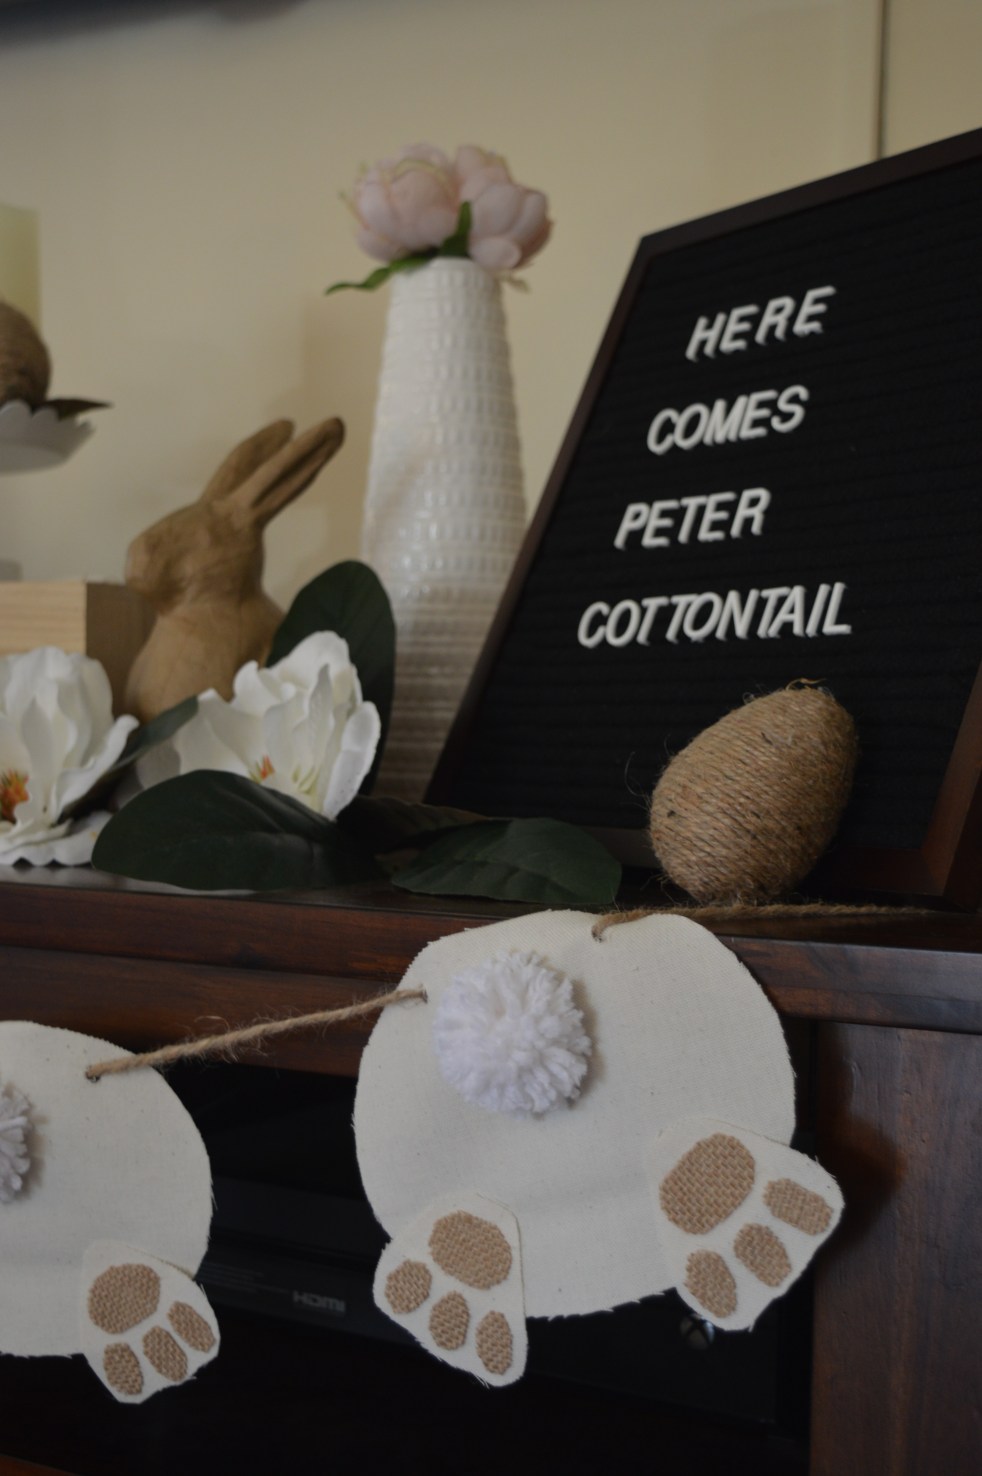
(P.S….Those little eggs are just Dollar store neon plastic eggs covered in twine *with hot glue*…super easy and so cute!)