

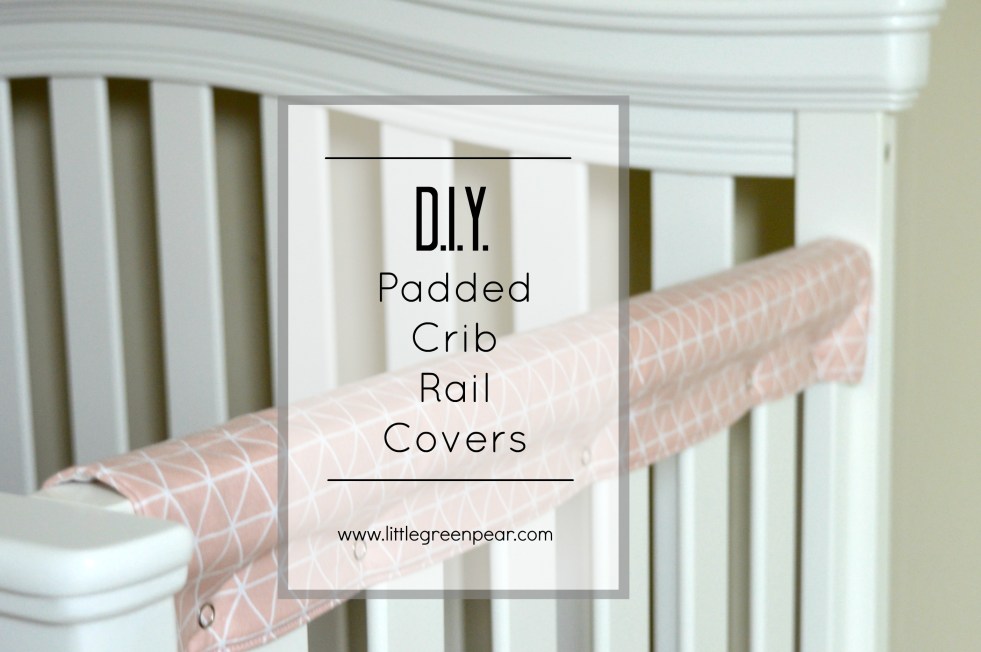
I should have done this a while ago…like before Reagan decided to use the sides of her crib to sharpen her nine tiny teeth.
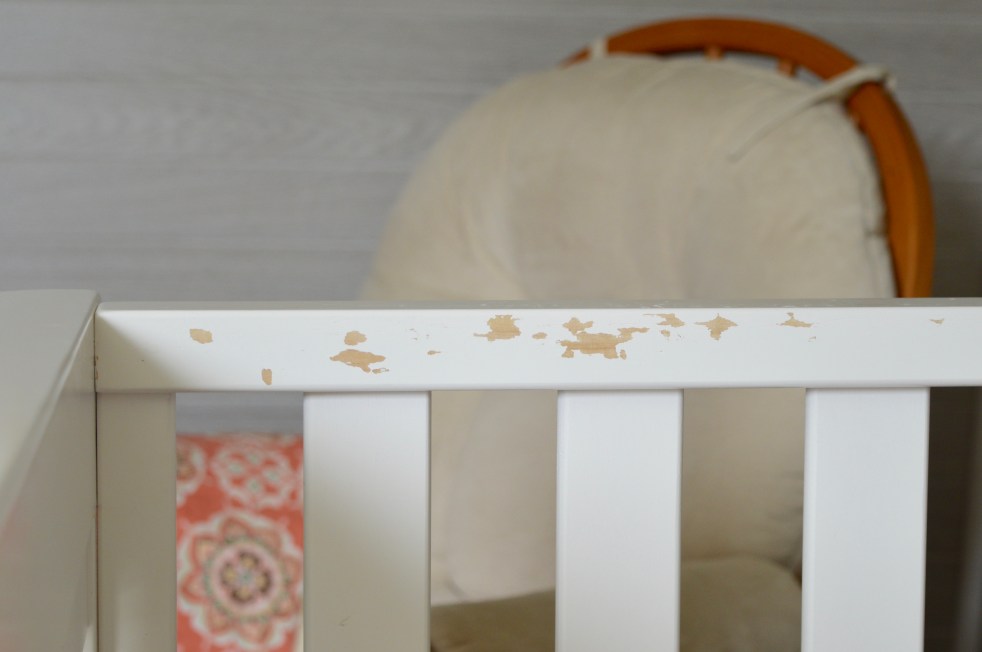
But, I’m doing it now before she chews her way all the way through…or strips off all the paint.
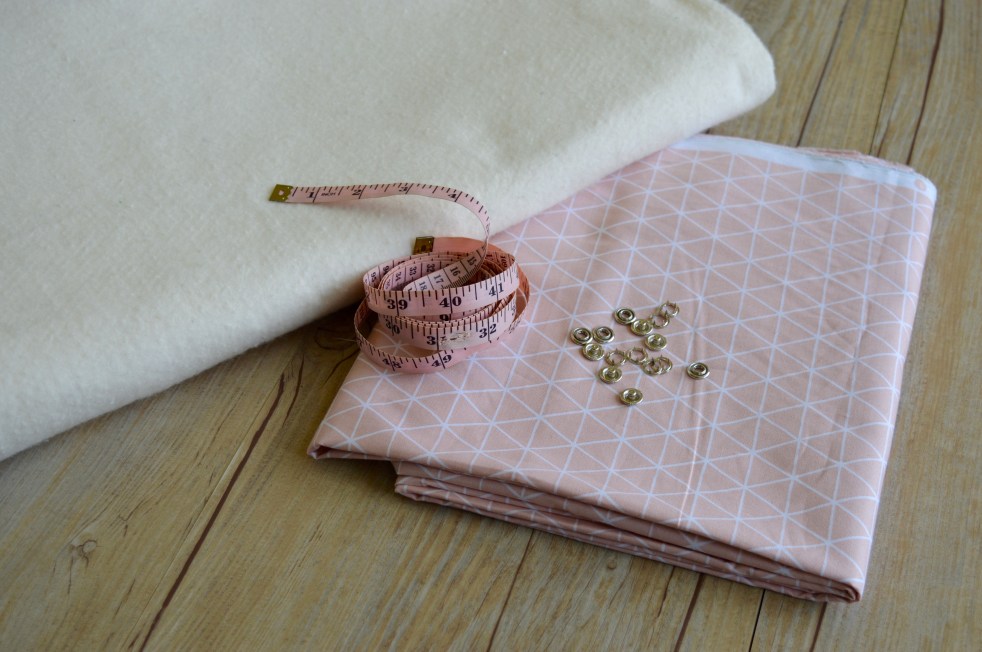
To make a set of crib rail covers, you will need:
- fabric
- batting
- snaps
- a sewing machine
- basic sewing tools: scissors, measuring tape, etc.
Since there are so many styles of cribs out there now, I can’t give you the exact measurements that you will need for each piece, but I will tell you what mine were, and I can show you exactly how I measured so you can find your own perfect sizes. (That’s the beauty of DIY…you can completely customize to your crib!)

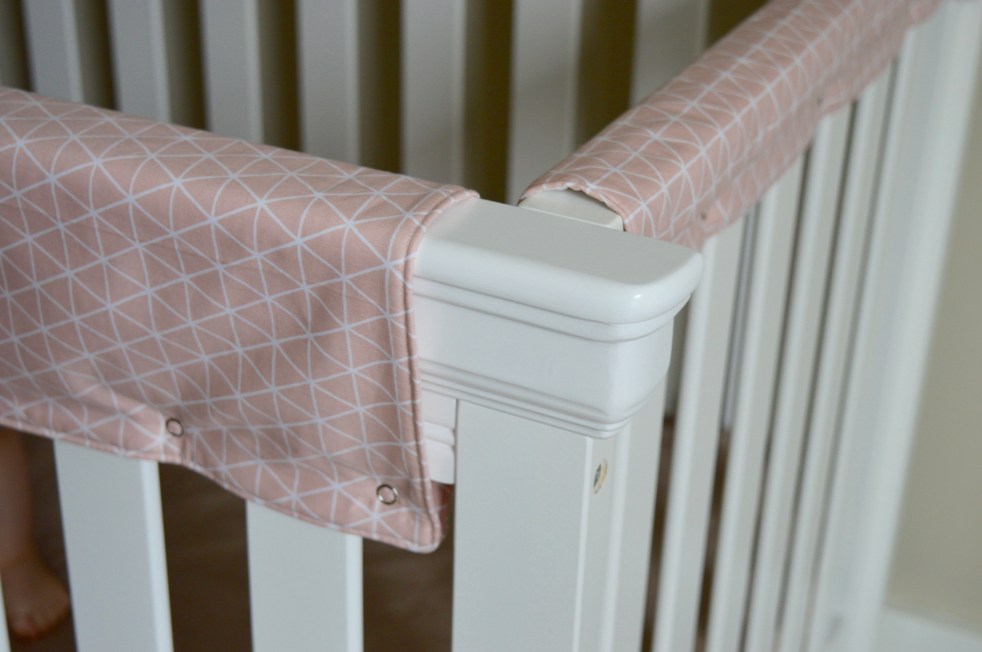
Make sure you measure the inside of the rail, not the outside. The covers will need to wrap around, so they can’t go all the way to the outside edge.

For me, that measurement was approximately 51″. The side rails were approximately 27″ from front to back. Add 1″ to your measurements to account for 1/2″ seam allowances.

Wrap your measuring tape around the rail to determine how wide your pieces will need to be. On our crib, the front rail is significantly thicker than the two side rails, so make sure if this is the case, you’re measuring both. For me, this meant I needed my front cover to be 15″ wide, and each side rail to be about 8 1/2″.
Once I added the necessary seam allowances to my measurements, I needed two pieces of fabric and one piece of batting measuring 52″ by 16″ for the front rail. I also needed four pieces of fabric and two pieces of batting measuring 28″ by 9 1/2″ for the two side rails. (*You’ll see in the pictures I usually leave my batting slightly larger just so I know it will hit all the edges.)
I only needed three rail covers for our crib because the back edge of the crib is high and decorative. Reagan can’t reach it, so we don’t need to worry about her hamster tendencies back there. Depending on your crib, you might need to account for a fourth side.

Lay your batting down and place one piece of fabric on top with right side (pretty side) facing up. Place your second piece of fabric on top with right side down, matching edges, and pin the whole stack together.

Stitch around the outer edge using your 1/2″ seam allowance, leaving an open space around 4-5″ wide that you can use to turn the cover right side out. Push each corner out with a pencil or the end of your scissors and iron the whole piece to make nice crisp edges.
Topstitch about 1/8″ from the edge to finish and close up the opening you left.
My initial plan was to add snaps for every other slat in the crib. Unfortunately, the front of the crib had twelve openings, so there was no way to do every other because I wanted to make sure both ends got a snap. (To be honest, this really annoyed me..) I decided to do two snaps, and then a space, then two more snaps across the entire front. This is another area that you can improvise for whatever works best for your crib.
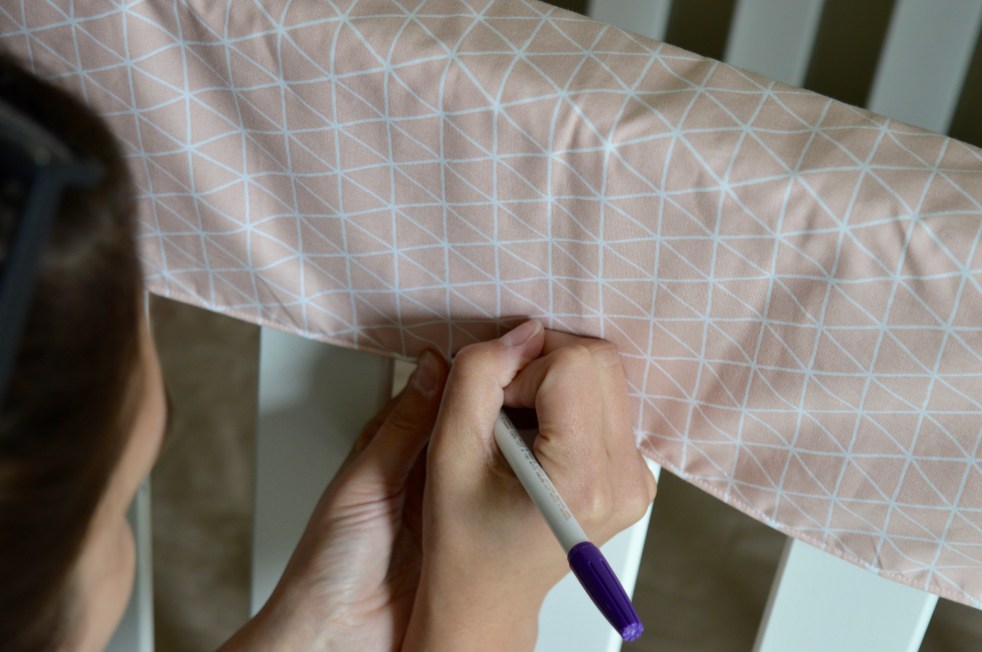

Wrap your pieces around the bar and use safety pins to secure it in place to determine your snap placement. Make a small mark with a disappearing ink fabric pen to mark the placement of each snap. If you have a tiny human helping you out, now is the time for a kiss apparently.
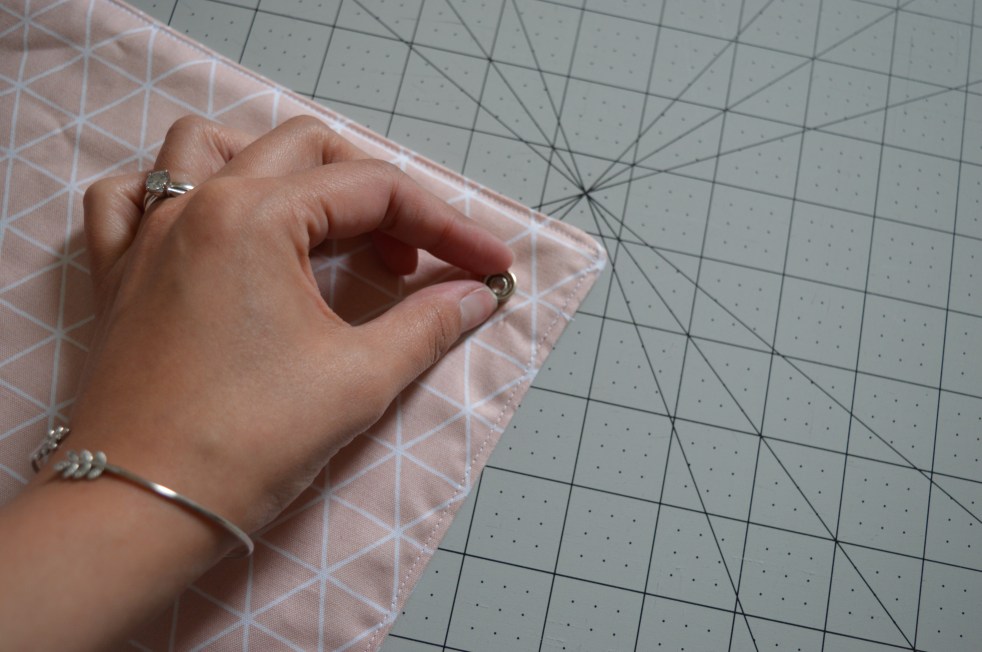

They do make a tool for snap application that looks like a big pair of pliers. If you like to use those to apply your snaps, more power to you…I hate them. I can never seem to get the two sections of snap to stay aligned correctly, so I end up with prongs poking through the fabric where they shouldn’t be, and then I have to pry them out and try again. I prefer using the little metal tool you can get with the snaps and a good old fashioned hammer. (Just put a cutting mat or other protective layer between your project and your table or floor.)
These will be totally machine washable, which we all know is pretty much a requirement for anything in the same house as a baby. The soft layer of batting inside gives just the right amount of cushion so your little one (hopefully) won’t be able to dig their teeth into the wood.

Please let me know in the comments if you have any questions about the process, or if you decide to give it a whirl, let me know how it goes!


Thank you so much for this DIY! I was gifted a used crib, so I wanted to cover up some existing damage on the wood from teething and protect the crib from further damage. I couldn’t find something online to easily purchase, so I decided to give this a try even though I’m very new to sewing. I’m so glad I gave it a whirl and am happy with how they turned out. I even went back and made a 5th one to make sure the entire rail was covered, which if I could do it over, I might have made 2 really long ones. Thanks again!
LikeLike